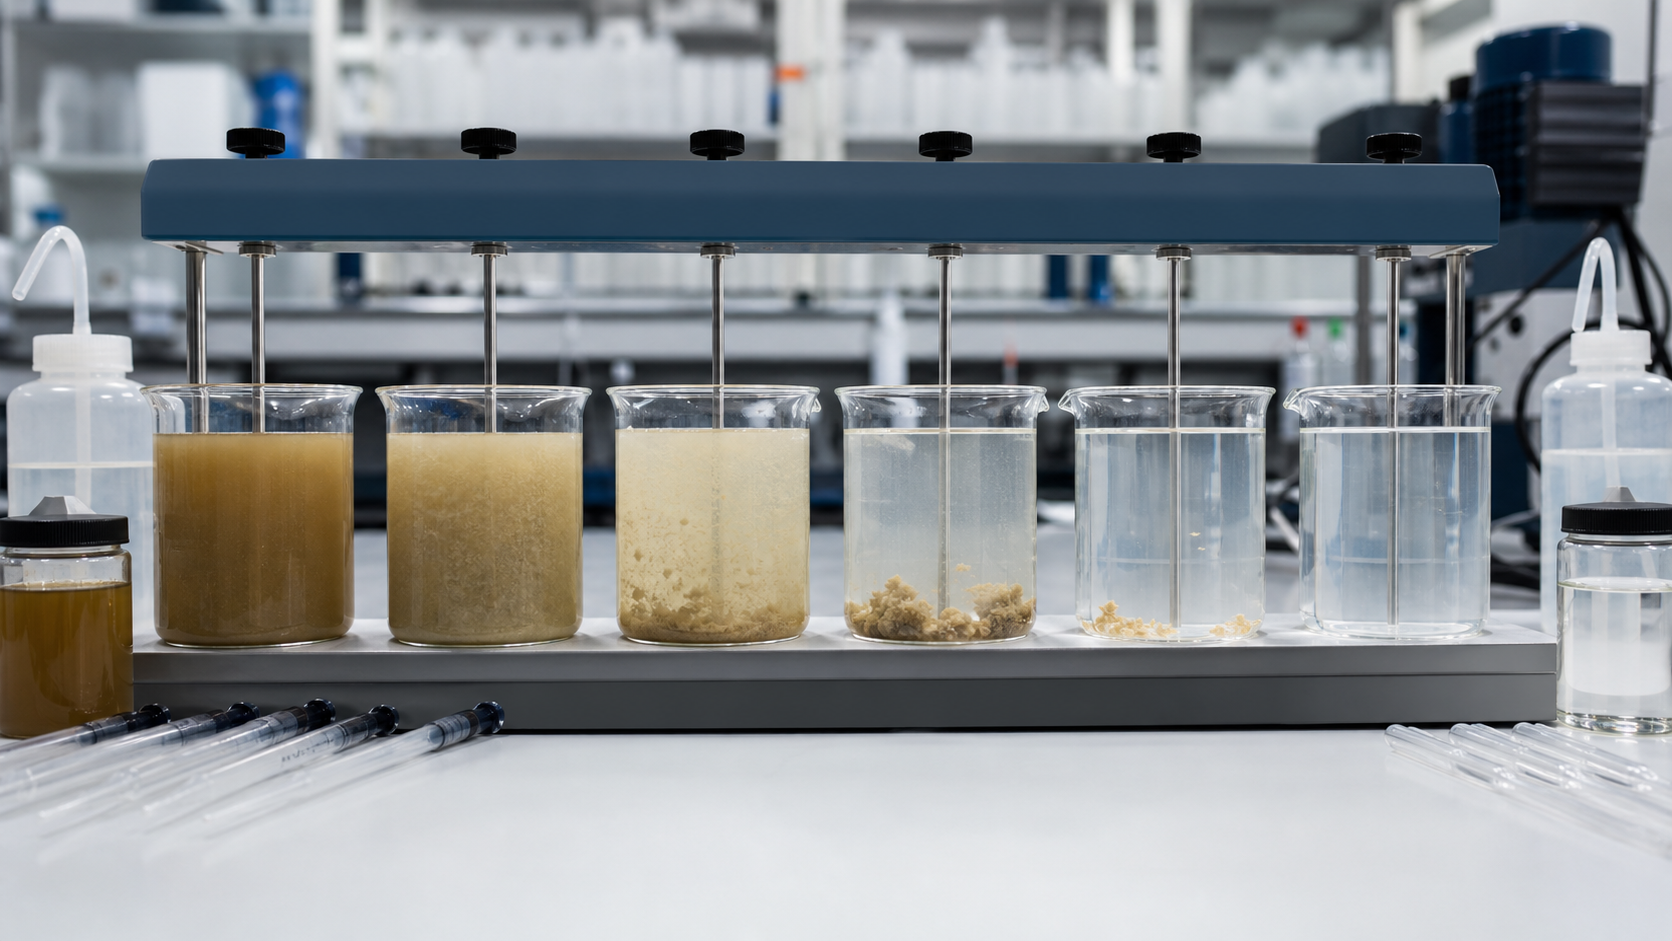
Jar testing is simple enough to run in a field lab, but easy to misread. The most useful result is not always the jar with the biggest floc or the fastest first response. In produced water treatment, the best jar test is the one that predicts stable plant performance.
This guide covers common failure patterns and what they usually mean.
Problem: No Visible Floc Forms
If the sample stays uniformly cloudy after polymer addition, check the basics first.
Possible causes:
- Polymer stock solution is under-hydrated.
- Dose is too low.
- Polymer ion type is wrong for the sample.
- High salinity is suppressing polymer expansion.
- Mixing was too gentle to distribute the polymer.
- A coagulant pre-step is needed.
Start by confirming make-down quality. Dry polyacrylamide needs time to hydrate. If the stock solution contains gel particles or fish eyes, the test is not measuring real polymer performance.
Problem: Floc Forms, Then Breaks Apart
This is common when the polymer looks good in a gentle jar but fails in a real plant.
Possible causes:
- Molecular weight is too low for the solids load.
- Mixing intensity is too high after floc formation.
- The injection point in the plant will expose floc to pump shear.
- The polymer architecture is not strong enough for the separation equipment.
For plant translation, repeat the test with a short shear step after floc formation. If the floc collapses immediately, the plant probably will not be kind to it either.
Problem: Bigger Dose Makes the Water Worse
This is one of the most useful warning signs. More polymer is not always better.
Possible causes:
- Overdosing is restabilizing suspended solids.
- Charge reversal is occurring.
- Excess polymer is creating haze.
- The charge density is too aggressive for the water chemistry.
When this happens, build a dose curve instead of jumping to another high dose. The optimum may be a narrow window, especially with high-TDS brine.
Problem: Clear Water, Wet Sludge
For clarification alone, this might look acceptable. For a plant that has to dewater sludge, it is only half a solution.
Possible causes:
- Clarification polymer is not suitable for sludge conditioning.
- CPAM is needed downstream for dewatering.
- Floc captures solids but does not build a drainable cake structure.
- Sludge sample chemistry differs from raw water sample chemistry.
Run a separate sludge conditioning test if disposal cost matters. It usually does.
Problem: Good Jar Test, Bad Plant Result
This is the most frustrating pattern, and it usually means the jar test did not match field conditions closely enough.
Check:
- Was the sample representative of live plant feed?
- Was the polymer aged for the same time as field make-down?
- Did the test include the same coagulant or pH adjustment?
- Did mixing intensity approximate the real system?
- Was the performance judged at the same retention time?
- Did the plant dose point destroy floc before separation?
The jar test should simplify the plant, not invent a different one.
A Practical Troubleshooting Sequence
When the test result is unclear, use this order:
1. Confirm sample quality and freshness. 2. Confirm polymer stock solution hydration. 3. Run a low-to-high dose curve. 4. Compare anionic and cationic options where chemistry is uncertain. 5. Test at least two molecular weight ranges. 6. Add a controlled shear step. 7. Evaluate both water clarity and sludge behavior.
This sequence prevents the most expensive mistake: changing three variables at once and learning nothing.
Keep the Test Connected to the Purchase Decision
Jar testing should produce a short list of polymer requirements, not just a winning jar. Record ion type, dose, make-down concentration, mixing sequence, settling time, supernatant clarity, and sludge response. Then use that record to compare supplier samples through the same procedure.
For product-side comparison after testing, the site's polyacrylamide supplier resource summarizes the checks procurement teams should make before scaling up.